The satisfying thwack of a pellet hitting its mark, the focused concentration, the quiet enjoyment of marksmanship – these are just a few of the reasons why airgunning is a beloved pastime. But what happens when the weather turns sour, or you just don’t have access to an outdoor range? The answer: bring the range indoors! Creating your own indoor airgun range is easier than you might think, and it opens up a world of shooting fun, anytime.
This post will guide you through the essentials of setting up a safe and enjoyable indoor airgun range, drawing inspiration from experienced airgunners. Whether you’re plinking for fun or honing your skills for competition, a dedicated indoor space can be a game-changer.
Safety First: The Non-Negotiable Foundation
Before we dive into targets and backstops, safety is paramount. Treat every airgun as if it were a firearm. Always follow the four basic rules of gun safety:
- Treat every airgun as if it were loaded.
- Never point the muzzle at anything you are not willing to destroy.
- Keep your finger off the trigger until you are ready to fire.
- Be sure of your target and what is beyond it.
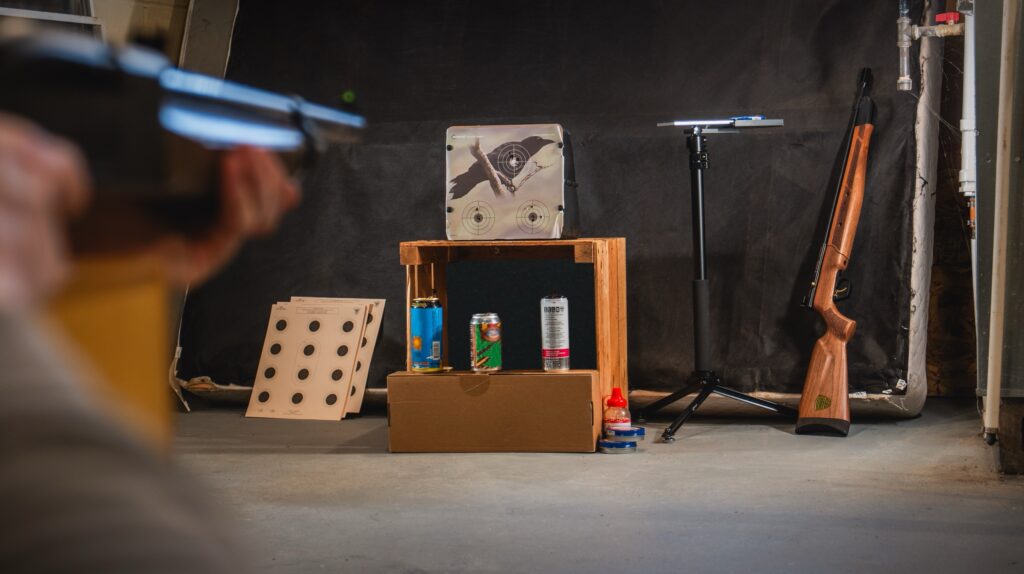
Indoors, this means carefully considering your backstop. A proper backstop is the most crucial element for safe indoor shooting. It needs to be capable of stopping the type of projectiles you’ll be using, though we’d recommend Pellets. Much like the cans they’re decimating, they’re designed to crumple upon impact, unlike BBs which bounce, and slugs may pack too heavy of a punch for indoor use. Don’t underestimate the power of even a small airgun!
Building Your Backstop: Stop Those Stray Shots!
A good backstop is the heart of your indoor range. Several options exist, each with its pros and cons:
- Commercial Pellet Traps: These are designed specifically for airguns and are readily available online and in sporting goods stores. They offer a reliable and convenient solution, often containing the projectiles for easy disposal.
- DIY Backstops: For the budget-conscious, building your own backstop is possible. Consider using multiple layers of dense materials like plywood, rubber, or even tightly packed rags. However, DIY requires careful planning and testing to ensure it can reliably stop your chosen projectiles. (Remember, safety first!) As one contributor on Airgun Nation forums suggests, multiple layers are key, allowing the impact to be absorbed progressively. Check out their discussions for more ideas (like this one: How to build an indoor shooting range for airguns).
- Avoid Hard Surfaces: Never use brick, concrete, or metal as a backstop. These can cause ricochets, which are extremely dangerous.
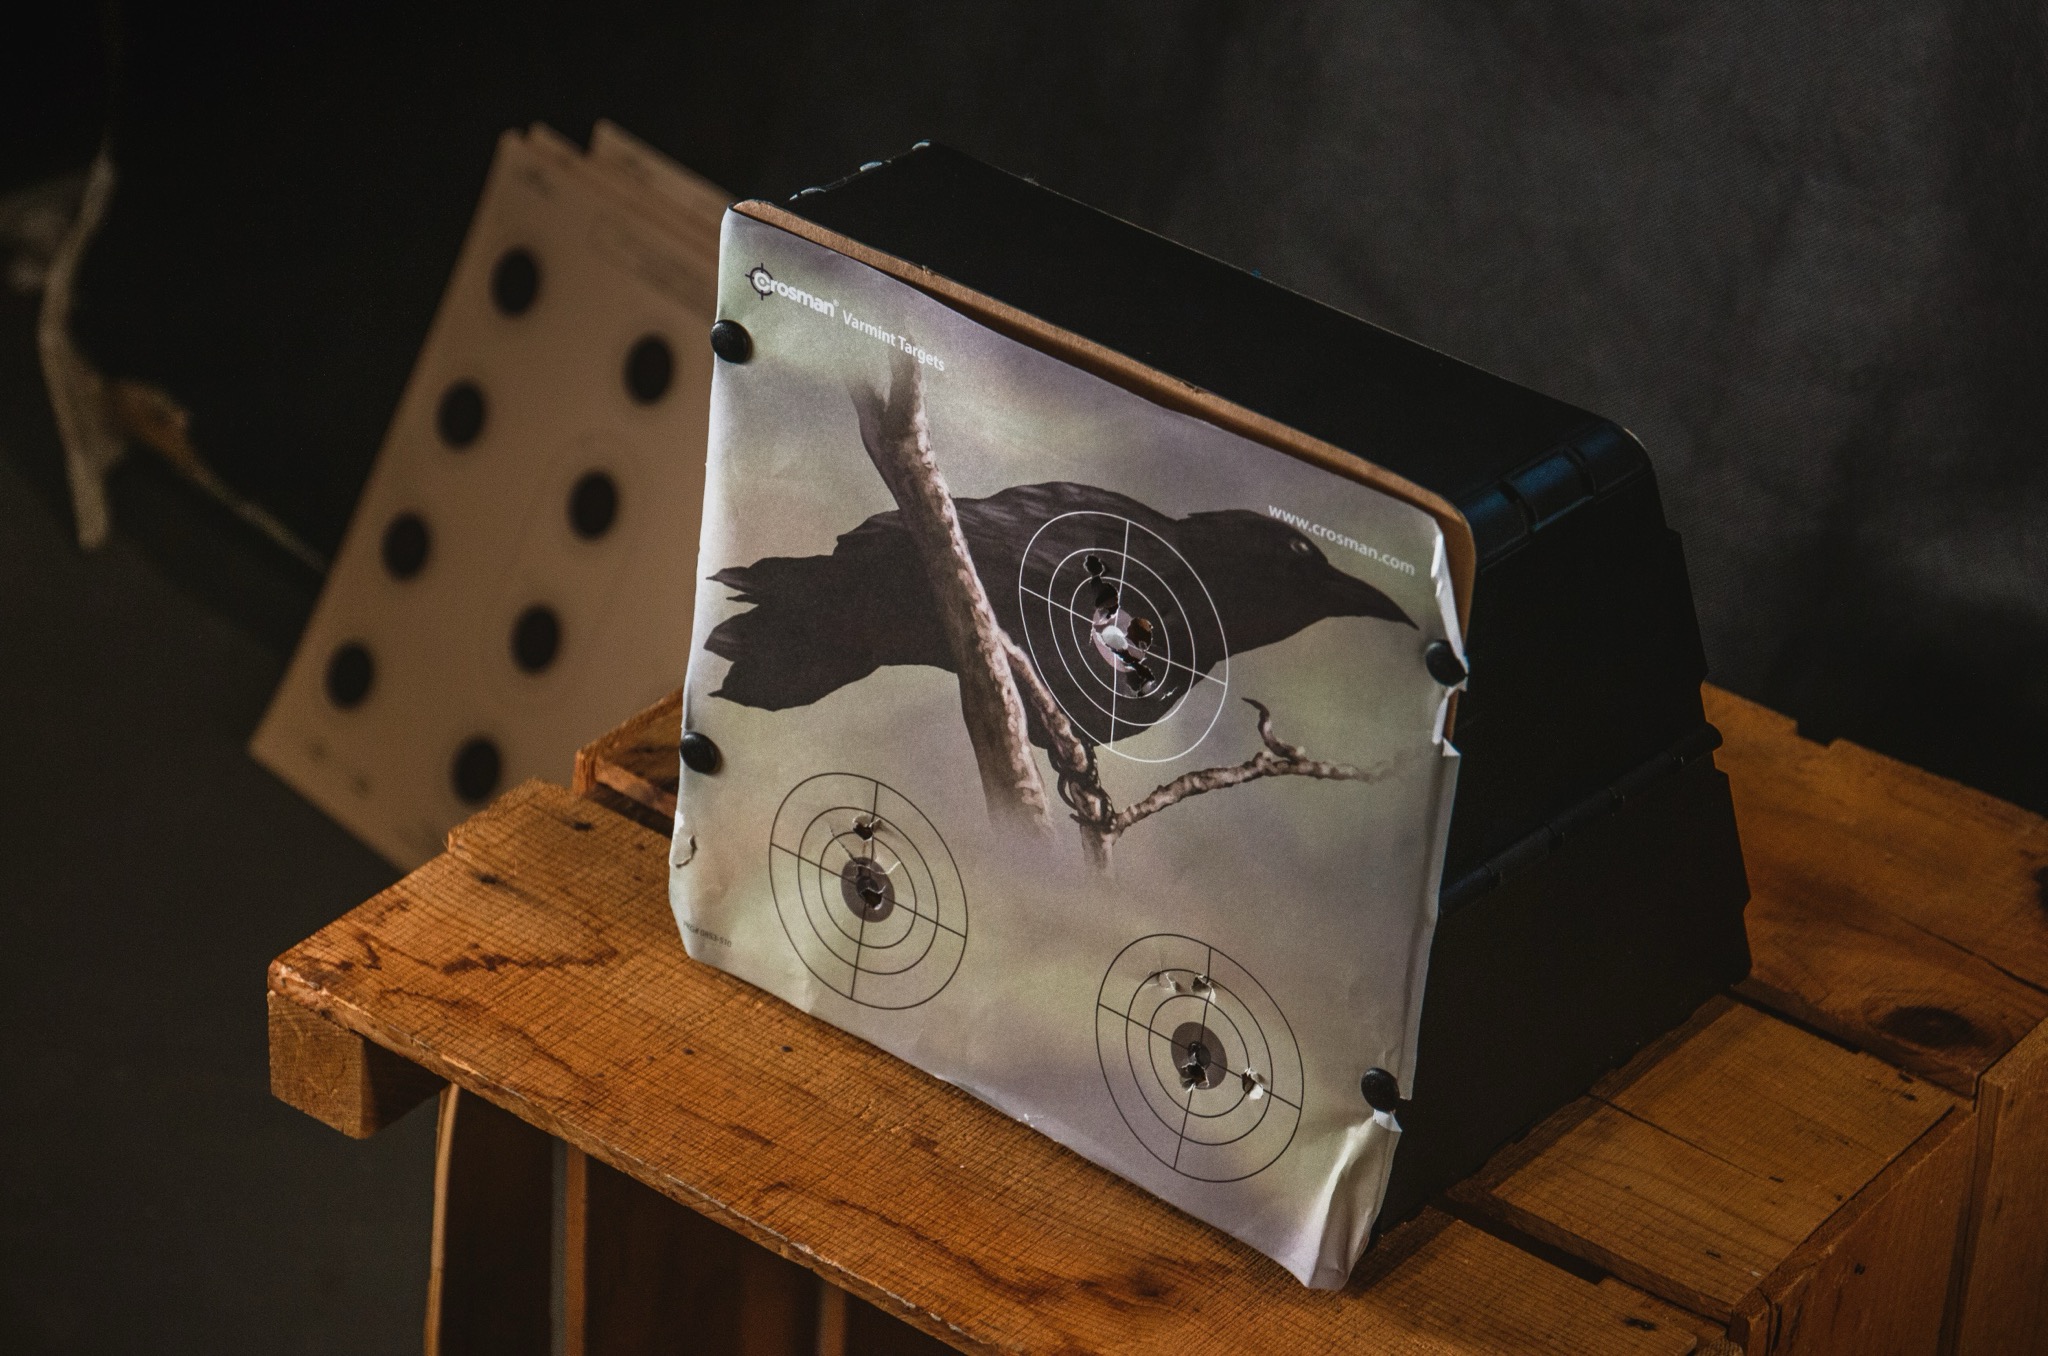
Target Selection: From Paper to Plinking
Once your backstop is in place, it’s time for targets! The options are plentiful:
- Paper Targets: These are inexpensive and readily available. You can print your own or buy them pre-made. They’re great for practicing accuracy and precision.
- Reactive Targets: These targets provide instant feedback when hit, adding an element of fun to your shooting. They can be made of metal, plastic, or even self-healing materials.
- Plinking Targets: For casual shooting, consider using cans, bottles, or other safe targets. Just be sure they’re appropriate for airgun use and won’t create dangerous fragments when hit.
Setting Up Your Range: Location, Location, Location
Choosing the right location for your indoor range is crucial. Consider the following:
- Space: You’ll need enough space to safely shoot and for your projectiles to travel.
- Lighting: Good lighting is essential for accurate shooting.
- Ventilation: If you’re using lead pellets, ensure adequate ventilation to avoid lead buildup.
- Background: Choose a background that will help you see your targets clearly.
Pyramyd Air’s blog (With airguns, home is the range – Part 1) emphasizes the importance of a dedicated space. Even a small corner of a basement or garage can be transformed into a functional range.
Taking it a Step Further:
Once you have the basics in place, you can customize your range further:
- Target Stands: Invest in a sturdy target stand to hold your paper targets.
- Distance Markers: Mark distances on the floor or walls to practice at different ranges.
- Lighting Enhancements: Add adjustable lighting to optimize visibility.
Final Thoughts:
Building an indoor airgun range is a rewarding project that allows you to enjoy the sport year-round. Remember, safety is always the top priority. By following these guidelines and taking the time to plan carefully, you can create a safe and fun shooting environment in the comfort of your own home. So, grab your airgun, set up your range, and enjoy the satisfying thwack of a well-placed shot!